
Set up your Outlook email on Android.
This guide adds your Microsoft 365 or Outlook email account to the Gmail app that comes built into your Android phone — no extra app to install. Follow the steps with screenshots below; the whole process takes about five minutes.
Before you begin
You'll need:
- Your Microsoft 365 work email address (e.g. yourname@yourcompany.com.au)
- Your Microsoft 365 password
- Your phone's authenticator app or SMS access for two-factor verification
If you're unsure about any of these, give us a call before you start — we'll walk you through it.
Note: Android phones from different makers (Samsung, Google Pixel, Motorola, OPPO, etc.) all share the same Gmail app — so these steps work the same on every Android device, even if your phone's other apps look slightly different.
Open Gmail and tap the menu icon
Open the Gmail app on your Android phone. In the top-left corner of the search bar, tap the menu icon (three horizontal lines, also called a hamburger menu).
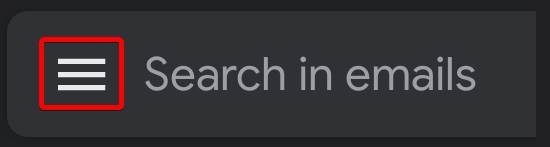
The hamburger menu icon at the top-left of the Gmail search bar.
The side menu will slide in from the left. Scroll all the way to the bottom and tap Settings, then on the Settings screen tap Add account.
Choose Exchange and Office 365
You'll be shown a list of email providers. Tap Exchange and Office 365.
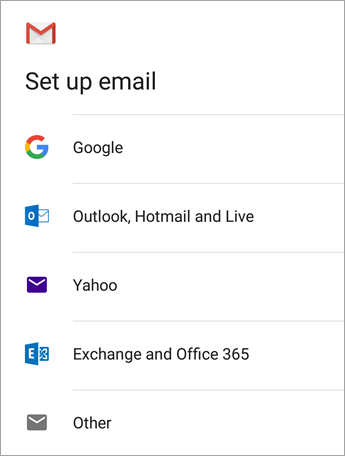
Tap Exchange and Office 365 — not "Outlook, Hotmail and Live".
Enter your email address
Type your full Microsoft 365 work email address into the Email field, then tap Next in the bottom-right corner.
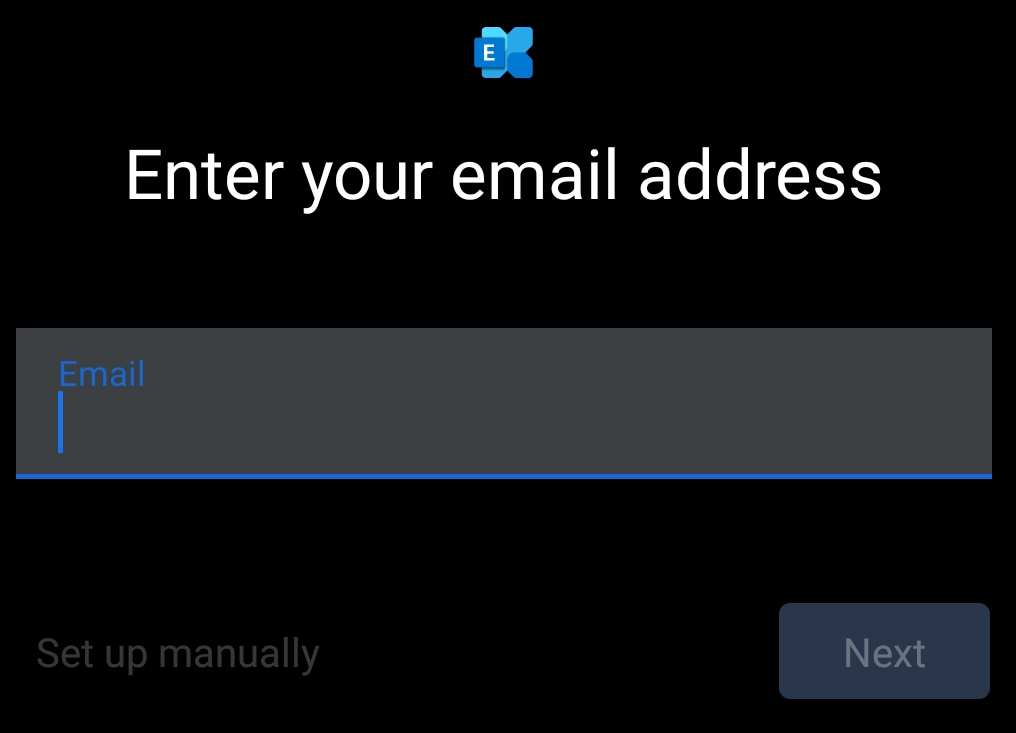
Enter your work email address, then tap Next.
Sign in with your Microsoft 365 password
You'll be taken to the Microsoft sign-in screen. Enter your password and tap Sign in.
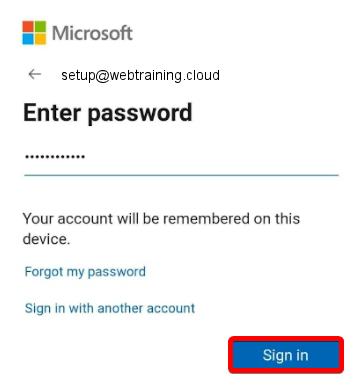
Enter your password — example email shown, yours will be different.
If your business uses two-factor authentication (almost all do), you'll then be prompted to approve the sign-in. This is usually done by:
- Tapping Approve in the Microsoft Authenticator app on your phone, or
- Entering a six-digit code sent to you by SMS.
Follow whichever prompt appears on screen.
If you see a "Redirect request" prompt, tap OKOptional
Some phones will show a small dialog explaining that Gmail needs to send your account info to Microsoft's autodiscover service to finish setting up the account. Tap OK to allow it. This is normal and required.
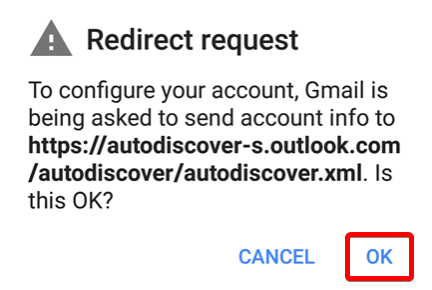
If this dialog appears, tap OK to continue.
Allow calendar and contacts to sync
After the account is added, swipe down from the top of your screen to open the notification shade. You may see a notification that reads "Unable to sync calendar and contacts". Tap it.

Tap this notification to grant calendar and contacts access.
On the screen that follows, tap Allow. This gives Gmail permission to sync your work calendar and contacts alongside your email.
You're done
Open the Gmail app — your work emails will start to sync within a minute or two. You can switch between your accounts by tapping your profile picture in the top-right corner.
Your work calendar and contacts will also start to sync automatically into the Calendar and Contacts apps on your phone.
Screenshots reproduced from HostPapa Knowledge Base and Microsoft Support for instructional clarity. All other content is original to Hello Computer.
Need a hand?
If you get stuck at any point, our team is happy to walk you through the setup over the phone or via remote support.